|
|
 A clump of garlic scallions from a bulb left in the ground the previous year. For anyone who cooks and likes zesty food, garlic is a year-round essential.  Doing without just isn’t an option.  Happily, garlic is absurdly easy to grow in Zone 4, so my goal is to never buy garlic, especially any shipped in from the West Coast where the majority of commercial garlic is grown.  For the most part, my goal of year-round garlic is met, but at this time of year, during the gap between the last bulbs  from the previous year and this year’s new crop, it might seem that buying garlic is the only option.
Turns out there are a lots of home grown options — as long as you’re willing to explore beyond the familiar, papery garlic bulbs that we all know so well.
Let’s start with last year’s crop. A single, fall-planted garlic clove transforms into a fully formed bulb with multiple cloves by July. With so little effort involved, it’s a great deal! Â Harvested and dried for storage, then kept in a cool, light, well-ventilated space, garlic bulbs last in good condition until sometime in winter when they start to form green sprouts that begin feeding off the stored energy in the clove.
Just before the sprouts form, we’ve found it pays to process and freeze all the remaining bulbs by trimming and peeling the cloves and popping them raw into a container for freezing.  (Good to do while watching the tube or cranking up the tunes.)  Frozen garlic can be used right out of the freezer and tastes just as pungent as when fresh.  A quick rinse to remove any ice crystals and the cloves are ready to crush or chop.  Easy and very handy to have around.
Our frozen garlic ran out out in April this year. Â Luckily we’d made it to wild leek (ramp) season when the slightly garlicky taste of ramps and the imperative to eat freshly harvested, wild green things, held us over for awhile.
Then it was on to the garlic chives. These are perennial plants similar in habit to common chives but with flat, strap-like leaves that offer a mild but distinctly garlicky flavor. Like regular chives, garlic chives are most tender and flavorful in spring and fall when the weather is cool. The garlic (or Chinese) chives have the added benefit of throwing up multiple clusters of tiny, white, star-like flowers in late summer and fall. These pretty little flowers  can be used as garlic taste-bombs, sprinkled on top of dishes.  The plants tend to be neater and better-behaved than their common cousin, so I often refrain from dead-heading and allow garlic chives to self-seed among the other perennials or tuck the plants into the corners of my vegetable beds.  The leaves can be chopped or clipped with scissors and added directly to salads or used as garnish.  When cooked, they should be added at the end to retain maximum flavor.
At this point June, it’s the season of  “garlic scallions,” immature bulbs that haven’t formed into cloves yet.  These can be used just like scallions including much of the stalk.  I can’t bear to use up any plants from my main garlic crop this way, so am always delighted to see isolated clumps of serendipitous shoots arising from last year’s garlic beds.  The shoots come from whole bulbs left over from the previous year’s planting that I somehow missed when harvesting in the summer. They simply stayed in the ground and sprouted in the spring.  Often they are from the less-robust bulbs that would have been under-sized anyway so these volunteers are perfect for use as garlic scallions.  I’m thinking about intentionally planting a few of my smaller bulbs this fall to ensure a steady supply of garlic scallions next spring and in early summer.
 Garlic scapes left to curl, just for fun. Next in line are the garlic scapes,  just now starting to form on my early crop of stiff-neck garlic plants.  These curling flower stalks should be removed, not only to capture the good eating, but also to signal to the plant that it needs put its remaining energy into the bulb. The scape ought to be picked before it starts to curl to avoid toughness but I tend to let some go a bit longer just to admire the scapes’ supremely smooth and elegant spirals. Scapes have a mild flavor, enhanced by quick steaming or sauteing. A newly discovered but delicious use is pesto made from garlic scapes.  Scapes will only form on stiff-neck garlic varieties.
Once the fall-planted garlic bulbs finally reach full size, it’s time to pick some juicy, crisp, young garlic. When garlic is harvested early, the skins are surprisingly moist and flexible, and the water-engorged cloves slice cleanly and crush with a satisfying crack. We like to cut and saute them in generous “garlic-as-vegetable” slices. Â If picked too early when the divisions between the cloves first form, the cloves will be undersized and mostly made up of the thick layers of skin. It’s interesting to see and feel their unusual texture at this stage but not much use in the kitchen. Â A little trial and error is required ascertain the right time to pull up the bulbs for young garlic.
For young garlic, I grow a 2′ x 3′ patch of  garlic in my hoop house, planted in October specifically for early harvest in June.  This gives me decent-sized young garlic bulbs a little earlier than the main crop and I can harvest early without feeling like I’m robbing from the all-important winter storage crop.  In another month, the skins of the garlic plants will become dry and papery and the lower leaves of the plant will begin to yellow and die. When the bottom 3-4 leaves lose their green color, its time for the main harvest.  But until then, let’s savor the many variations on a garlic theme available in the early summer garden.
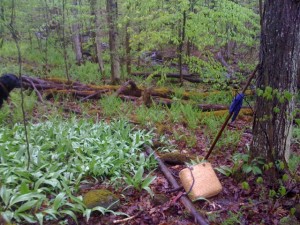 Wet woods in May at a patch of wild leeks. Record-breaking flood levels on Lake Champlain, saturated soils, galloping streams, and days of rain. Depression and complaints about the weather abound. But rain can be beautiful too.
Tromping through dripping, soggy forests can be miserable but with a water proof cap, a rain jacket to keep the core dry and rubber boots for splashing through the muck, it’s really not so bad. After a long winter, I certainly don’t want a little rain to keep from communing with the newly green forest!
Once under the canopy of the trees, diffuse light, unbroken by shadows, glows with surprisingly warm hues. Glistening vegetation shines bright against darkly moist leaves on the ground, mosses and lichen vivid with moisture. These delight the eye while gurgling brooks and rushing streams bring pleasure to the ear. And then there’s always food to be found for the belly!
Today’s wet ramble brought me to the dead, crumbling elms at the bottom of our hill, bursting with pheasant back mushrooms (Polyporus squamosus). Unlike other wild mushrooms, pheasant backs are easy to find and their fruiting predictable. They appear reliably when the trees leaf out and identification isn’t hard, especially because of their oddly out-of-context scent. Who can ever forget the distinct smell of watermelon rind exuding from a wild mushroom! They can be very tasty if picked as young nubs, while still tender. As always, do your homework to positively identify wild mushrooms and cook them well.
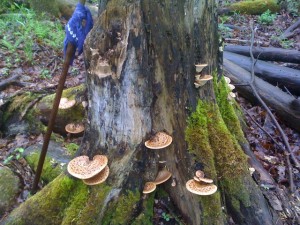 Pheasant back mushrooms ready to pick. Tonight, the pheasant backs were added to a barley risotto, seasoned with wild leeks (ramps), a veggie broth, dry white wine, butter and sea salt. It was my most successful dish to date using pheasant backs. Finished off with parsley from the garden and a grating of a local hard cheese (the superb Cabot Cloth Bound Cheddar) then plated with fresh-picked asparagus and a light salad of lettuce, arugula and claytonia from the hoop house, this turned into a surprisingly satisfying feast.
The finely chopped mushrooms disappeared into the risotto’s creaminess, giving it a gentle, savory flavor. In past efforts to cook pheasant backs, the rubbery texture of the mushrooms detracted from the taste. Evidently, the key is to cook them long and slowly.
For the risotto, I riffed off of several recipes in Epicurus (search on “barley risottoâ€). After sautéing all the ingredients and deglazing with wine, hot broth was added then cooked under pressure for 10 minutes before cutting the heat and letting pressure release naturally. (You don’t need a pressure cooker to make barley risotto.) Just before eating, I added a little more broth together with finely chopped wild leek leaves, cooking them briefly until hot and fragrant. The parsley and cheese were sprinkled on top.
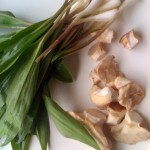 Wild leeks and pheasant back mushrooms, cleaned and prepped for cooking. Since discovering barley risotto recently, it has become a favorite dish. As a lover of grains, I prefer meals composed primarily of vegetables and what Eric calls “variations on gruel.†Risotto, one of my favorite gruels, provides a neutral foundation for nearly all the delicious produce gathered from woods and garden. So learning that it can be made using unrefined barley instead of the usual white, Arborio rice, was a revelation.
I recommend this nutritious and satisfying food to warm you after a wet walk in the woods, in hopes that it will raise your spirits as the rains continue to fall.
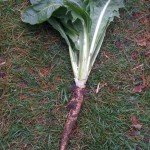 Belgian endive grown as a root crop. Imagine a care free-crop you can grow all summer, pick in the fall and store in a closet for winter harvests of  fresh, crunchy salads. It’s not a dream but a Belgian endive!
I’ve just started harvesting my 2010 crop this month. It all started back in June when the endive was planted along with my storage carrots around the summer solstice. Over the warm months the plants grew dark green, lettuce-like leaves and deep, vigorous tap roots. There’s no temptation to harvest the leaves at this stage as they taste impossibly bitter.
In mid to late fall, I dug up the plants along with other roots destined for the root cellar. The endive leaves were cut off, leaving a stump about an inch high above the root, and the roots trimmed to leave about 6 inches of the fattest part.
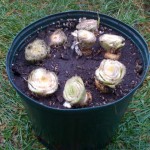 Pruned and potted endive roots, ready for forcing. For my compact, house-friendly, no-mess forcing system I use a 5 gallon bucket to contain any moisture, and replant the endive roots upright in a 3-4 gallon plastic nursery pot with used potting soil, packing the roots closely together. The pot is watered thoroughly and after it drains, placed into the bucket and covered loosely with several layers of newspaper, or an overturned cardboard box and the bucket cover. The point is to keep light out but to let air circulate.
Then comes the hard part. Â You need to find a consistently dark place with a temperature that stays around 50 degrees F. Too warm and the resulting leaves will be fuzzy and lack crunch. Too cold and the roots will refuse to sprout. Any light penetration onto the leaves will turn them green and render them inedible.
I use a closet on the north wall of the house in our guest bedroom that is kept cool when not in use. I keep my fingers crossed that no one will visit for an extended stay and over-heat the room during the period the endive shoots or “chicones” are growing!
Commercial growers of Belgian endive tightly pack the roots in boxes of sand and grow them in a dark, temperature-controlled place. I tried sand my first year but found it too heavy to lug around. Any medium that holds moisture and drains well seems to work just fine. Since potting up the Belgian endive occurs at the same time that I am dumping out the soil from the summer’s potted plants, it makes sense to reuse the spent soil for this purpose.
 Chicones in February, ready for harvest. If you want succession crops throughout the winter, you can store the pruned Belgian endive roots in a cold root cellar or in the bottom of a fridge, just as you would other root crops, either in a loosely sealed plastic bag or planted in a dry medium that can be watered and brought to 50 degrees when you’re ready to begin forcing them. I found that one bucket usually suffices especially because most roots will continue to push up multiple small buds after the first cut. And by the time those are done, we are usually harvesting ample greens from the early spring hoop house.
French chefs are said to carefully cover Belgian endive in their shopping baskets to prevent any light from greening the leaves on the walk home. Â That not only illustrates how easily the endive leaves can be ruined by light but also testifies to the aliveness of produce grown at home or from local fresh markets.
It’s the slight sweetness from blanching and the hint of bitterness that accompanies the mild flavored, cream colored leaves that make Belgian endive such a prized ingredient in winter. I love simply picking the chicones, rinsing and breaking them apart for perfect little leaf “boats,” crunching them along with other raw vegetables or filling them with tasty dips for appetizers. They also can be cooked as in this pan-braised recipe, transforming the crisp leaves into a smooth, caramelized side dish — delicious but something I rarely make because I can’t stand to use up so many chicones in one recipe.
Tonight I made a version of this Belgian endive and mache salad that, accompanied by Eric’s just-baked, crusty bread, made a light but very satisfying supper. Â It was a special thrill to use mache harvested this afternoon from our hoop house, still-tart Empire apples from a local orchard, and a tangy, smooth Vermont blue cheese, dressed with our home-made apple cider vinegar, maple syrup and a local sunflower oil. Â Who says you can’t produce wonderful fresh salads in February, even in Zone 4!
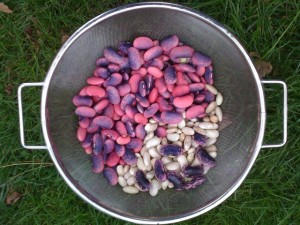 Beans at various stages of maturity from scarlet runner and other pole bean varieties. Beans have me entranced.  Each year I plant ever more varieties for drying and shelling. The colors, patterns and sizes, the smooth coolness clicking through my fingers, the ease with which they grow, and the tasty and nutritious meals they create, keep me under their spell.
As a teenager, I was shocked to hear my very proper grandmother recite, Beans, beans, the musical fruit / Makes your pants go tootely toot! I realize now that everyone knows that rhyme and the only thing shocking about it is that I’d never heard it before then. But whenever I recall the rhyme now, the word musical is replaced in my mind by magical.
I came under the spell of dried beans a few years ago after reading Gaia’s Garden. It inspired me to begin experimenting more deliberately with polyculture, the art of growing mutually beneficial plants together. The theory suggests we mix in with our primary crops, plants that serve specific functions of enhancing plant and soil health such as those attracting beneficial insects (dill and fennel blossoms), nutrient accumulators (dandelion and comfrey), and nitrogen fixers (clovers and legumes). So I started tucking bean seeds in between the tomatoes, lettuce and using the classic native American technique of vining beans on corn.
The beauty of growing beans for drying this way is that you can seed the beans in early summer and then forget about them until fall. Once brown, the whole plant with the bean pods attached can be pulled up (or cut the stem and leave he roots) and stored in a dry,  airy place for a week or two before threshing.  The beans appear to grow compatibly with a wide variety plants and different varieties of beans can be planted side by side. More often than not, they will form beans true to seed. This enables those us who garden intensively in limited space to have the pleasure of growing a rainbow of bean varieties.
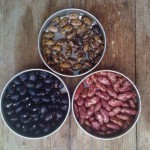 New bean variety on top with the likely parents below. (Click on images to get a blow-up.) Occasionally cross pollination does occur. This summer I ended up with some attractively speckled beans – black on a tan background – that were nothing like the beans I’d planted. I’m guessing that my new bean is a cross between King of the Early and Black Coco. I’ll plant the new variety this summer and see how it grows and tastes. Perhaps it will provide a gateway into a new hobby in plant genetics.
Home grown and dried beans are great in the kitchen too. Â Not only are they delicious but if used within a year of harvest, they cook much faster than most store-bought beans.
I prepared a taste test of four of my home grown bean varieties for a dinner party last week and cooked each batch separately in my pressure cooker, paying close attention to timing. In retrospect maybe the pressure cooker wasn’t the best approach. Even with the extra vigilance and drastically reduced cooking times, I nearly over-cooked all the batches. Â Furthermore, the beans may have been over-soaked in a misguided effort to make them as tender as possible. Â Achieving that perfectly cooked bean between too firm and too soft is tricky since the older and dryer the bean, the longer it needs to soak and cook so to determine the cooking time, Â you not only need to consider the variety but also the age of the bean.
Since the beans were a little mushier than they should have been, I don’t think the taste test was a true as I’d hoped. The flavor and textural distinctions between varieties were negligible. We tasted both the liquor (cooking water) and the beans. The only flavoring was salt. My previously identified favorite, the Hidatsa Shield Bean, did not impress our guests. I thought it had a sweet note that was lacking in the others, but the two early-ripening kidney-style beans, King of the Early and Tigers Eye, that I had dismissed as less flavorful, got surprisingly high marks. Scarlet runner beans were notable for their large size and slightly spicy flavor, especially in the richly colored liquor.
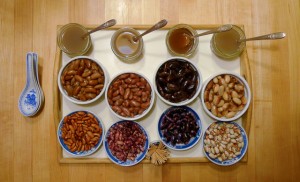 Bean varieties taste tested, from left: Tigers Eye, King of the Early, Scarlet Runner, Hidatsa Shield The overall take-home from the tasting was nothing new – that all fresh, home-grown dry beans are quick to cook and delicious. Inexplicably, perhaps because of the beans’ freshness or due to the thorough soaking and rinsing before cooking, Â I experienced none of the infamous bean-induced music after the tasting.
Based on what I’ve learned as a bean-obsessed gardener, allow me to offer an alternative version of the bean rhyme. Â (I tried but couldn’t come up with a good phrase to end with astute.) Â If you have a better rhyme, don’t be shy. Â Please share it.
Beans, beans the magical fruit!
Easy to grow and ever so cute.
 A groundhog, outstanding in its field. Gardeners unite in observing the second of February as the start of spring! Despite the annual, mindless media babble at Ground Hog Day, the party line that pegs the start of spring to the equinox, and the persistence of the northern winter lasting many more months, spring’s initiation belongs in early February. It has everything to do with light.  At this point in our revolution around the sun, the rate of change in the lengthening daylight begins to accelerate.
Our bodies can feel it, as can all living beings.  (At least those of us who remain unfrozen!)  Plants can once again obtain enough energy to put out new growth. Our fur-less human skin resumes its remarkable ability to metabolize Vitamin D from sunlight.  (Since Halloween, the sun angle in the north has been too low to power these phototrophic miracles.)  From now until May Day and then more slowly to the Summer Solstice, we’re in for a heady ride of ever increasing daylight!  Whee!
Agricultural societies around the world have marked this turning point in the midst of winter. Ancients in Britain celebrated Imbolc – the first of the four cross-quarter days, mid-way between the winter solstice and the spring equinox. Candlemas, a feast in the Christian calendar, also occurs at this time, marking the end to Epiphany and making a turn towards Lent. Themes of purification are expressed in practical traditions of cleaning out any wilted and dusty remnants of the Christmas celebrations.  In northern cultures, Candlemas, marking the mid-point of winter, was the time to check stores of food and fuel to ensure that half remains.
Setsubun in Japan, also observed in early February, marks the start of spring, often coinciding with the lunar new year. Households gather to toss roasted soybeans out the door, voicing a chant to throw out the demons and welcome luck into the home. Chasing masked demons adds to the drama and fun. Â Beans are then eaten to bring good luck — one bean for each year of a person’s age. We could benefit from adopting a version of the Setsubun customs to help banish the corrosive effects of cabin fever, winter sicknesses and the overall blahs and to invite fresh aspirations for health and happiness into the home.
 Kindergarten depiction of Setsubun To celebrate Ground Hog Day properly, we need meaningful and up-to-date traditions in keeping with the past. Here are a few ideas.
- Cast out the demons by giving the house a good cleaning, chasing out the dust bunnies, recognizing that no matter what the groundhog sees today, there will surely be a another two to three months of life indoors. Â Gardeners might as well clean and sort now because once the greening finally arrives, housework will have no appeal whatsoever.
- Bring good health and happiness into the home by giving potted plants a deep watering in a sink or shower, rinsing the leaves, and amending the soil with worm castings (restocking your worm bin with fresh leaves, paper, straw or other carbon materials too), and pruning and fertilizing the plants to fuel vigorous new growth.
- Start life anew by planting seeds. Toss some seeds into a jar and sprout them, adding a fresh zing to meals. If you’re inclined to start onions and other long-season seedlings in February, then use this occasion to set up the seed-starting gear and get planting.
- Feast with friends, preparing hearty meals that take time to cook and eat, bringing in new flavors by experimenting cuisines from around the world.
Any other suggestions for observing the day?
If gardeners claim Groundhog Day as our own, should we settle on another name?  Do we really want to honor an arch-nemesis?  But change to what?  “Candlemas†is pretty but too churchy and ethereal. “Imbolc†feels too pagan, with superstitious undertones.  Others are too obscure.
Despite my initial qualms, I think  “Groundhog Day†works.  It conveys an appealing irony and playfulness.  We could even get semi-serious and infuse Groundhog Day for Gardeners with a  “love thy enemy†or “live and let live†message – a worthy reminder, with a hint of social and ecological significance.
On that note, Happy Groundhog Day, and to all those hibernating varmints, dreaming of tasty picking in our gardens, we love you!
 Old seed storage system on left, new system in the middle and jars for the home-grown seeds on the right. ‘Tis the season of seeds! Â A time to organize and order seeds for the up-coming season while other garden-related tasks are at a standstill and before the seed companies get too busy.
My process starts at the computer, updating the Excel seed list, highlighting any seed varieties or types that are out and that need to be purchased. Â Then I study the seed catalogs, deciding whether to order the same varieties as before or to try something new. Â It’s an OK system but every year, I end up spending a little time searching the web to see if anyone has a better idea or has developed a brilliant new tool for keeping track of seeds.
In that pursuit,  I recently came across this video presenting a very simple and elegant system for storing seeds. For years I had stored mine in Oblaten tins because they were available, having received the delicate wafers as a gift every Christmas.  I couldn’t bear to throw out such nice tins so ended up storing seeds in them.  It wasn’t a bad system — the tins were tight and kept moisture out but the round shape was clumsy to use and space consuming.  Plus I had to group seeds in into broad categories like “roots” and “tomato family” that meant sorting through a pile to get to the ones I needed.
Once I saw how much easier and efficient it would be to store “carrots” separately from “radishes” in clear, Â ziplock sandwich plastic bags, I immediately made the switch. Â Goodbye tins, hello baggies. Â Hope this will be the first of many new and improved gardening systems for 2011!
 Chester and Baruk cozifying with the potted rosemary and cacti during a December snow storm. In June, when trees are in full leaf, flowers abound and breezes pass through the permeable boundary between indoors and out, I occasionally pause to remind myself that in less than six months all will be radically transformed.  Our Technicolor world will vanish and be replaced by black and white. My summer-self wonders how we can possibly tolerate such deprivation and all the difficulties of winter — the freezing cold, persistent darkness, layers of clothing, shoveling snow, hauling wood, and the hazardous walking and driving conditions.
On this week of longest nights, protected from the life-threatening cold by a well-insulated house, I am reminded again as I do every year at this time, the appeal of our Zone 4 winters. It is best expressed in a recently made-up word – cozification. Cozification happens in winter when protected from cold, with a pot of soup and a good book and/or warm companionship. The verb form, cozify, can be very expressive too, as in “I’d rather stay home tonight and cozify.†(I thought I had invented “cozify†but Google indicated otherwise. It seems to be especially popular in blogs about interior decorating, as in “I still need to cozify my new living room.â€)
You might dismiss the desire for cozification as a mere Christmas card cliché, but I think it goes deep into our animal imperative to seek shelter from the elements and to curl up conserving energy. Add to that, a very modern human need for quiet rest and reflection. Without cozification, who could bear the winter?Â
For northern gardeners, winter offers us some real advantages over our counter-parts in gentler climes. How do they maintain their enthusiasm for gardening without an annual break from their toils? How can they plan the next season’s strategies without the blank canvas of a snow covered garden? What incentives do mild, tropical evenings give for researching new garden theories, techniques and plant varieties? Pity those Zone 9 and 10 gardeners with their lush winter trees full of avocados and oranges! When the next snow storm blows in, snuggle up to the fire with your seed catalogues and cozify in good cheer!
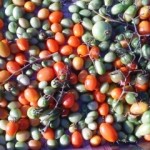 Green tomatoes picked before frost, ripening on trays We’ll be staying close to home for Thanksgiving so can source the majority of ingredients for the feast from our 2010 harvests. As with every growing season, there were notable ups and downs but thanks to unusually good weather for plants, the successes far exceeded the failures. Here’s a list of what’s still available fresh and preserved for the Thanksgiving menu and beyond.
In the garden (protected with floating row covers)
Rainbow chard
Kale
Leeks
Fennel bulbs
Stored in the root cellar (cool moist storage)
Brussels sprouts
Red, green and Savoy cabbages
Red and golden beets
CeleriacÂ
Carrots
Growing in the hoop house
Flat leaf parsley
Scallions
Sage, thyme, chives, tarragon, mint and oregano
Lettuce, mache, curly endive and arugula
Radishes
Growing in pots in the house
Rosemary
Lemongrass
Key limes
Thyme, parsley, mint, shallot greens, cilantro
Belgian endive (in a cool, dark closet – not ready yet)
Dry storage in the house
Potatoes – German butterball
Winter squash – Carnival
Garlic and shallots
Tomatoes (green tomatoes ripening on trays in mud room)
Preserved
Dried morels and porchini mushrooms
Hot peppers including dried red, frozen serranos and anaheims, and habanero sauce
Frozen basil pesto
Frozen sweet corn
Dried beans – several varieties including tiger’s eye and Hidatsa shield bean
Poppy seeds
Tomatoes – dried, oil-roasted and canned salsa
Raspberry jam, mixed wild berry jam and apple butter
Violet and elderberry syrups
Maple syrup
Dried herbs for tea including nettles, raspberry leaf, red clover blossoms and mint as well as roasted dandelion root
Dried herbs for cooking including thyme, dill seed, coriander and oregano.
Products that failed to make this year’s list due to poor timing, seeds that weren’t viable, not planting enough or just plain forgetting to plant them at all included onions, pumpkins, parsnips, turnips, rutabaga, Chinese cabbage, and cilantro. Pickles aren’t a big priority for us but I wish we’d gotten around to at least making dilly beans. I will aspire to include all of these and more on the 2011 Thanksgiving harvest list.
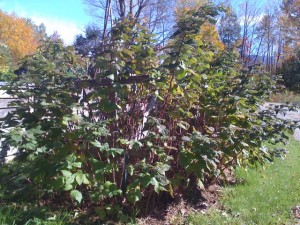 Raspberry row BEFORE pruning Faced with a long list of seasonal garden tasks in the fall — from planting garlic to capturing leaves, to preparing the garden beds for spring — the long row of raspberries often claim attention first. Pruning raspberry canes makes them more productive and easier work around when the raspberry picking season comes next summer. For those like us with prominently displayed raspberries, pruning also makes the row look more presentable, especially during the winter season when the canes are bare.
Raspberry pruning should be reserved for days that are cool enough for a full-cover of thorn-resistant clothing but warm and dry enough for the relatively slow-moving task and frequent kneeling. I’m not aware of any botanical timing concerns for pruning raspberries — any time from fall to spring should work just fine — so for this task, you can indulge in attending to your own comfort.
Pruning raspberries and other fruits that grow on canes isn’t difficult. Next year’s fruit will grow on the canes that grew out of the ground this year, so the goal is to cut out last year’s spent canes. In fall it’s easy to see the difference between the two because this year’s canes have a lively bronze or reddish color and many still have leaves attached to them. Old canes look old. They have brown, cracked bark and bare branches. Once you identify which are the old canes, cut them out at the base. If they are sufficiently dried out, sometimes they will snap off at the base with just a yank of a gloved hand.
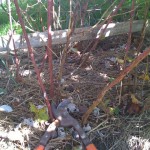 Removing last year's gnarly canes. While pruning, I also cut out some of the new canes that are short, spindly or growing too far away from the row. If healthy green leaves remain on these, you can dry them for use in herbal teas. Raspberry leaves are said to be rich in vitamins and minerals and can be used as a daily tonic alone or in combination with other herbs, as the taste is mild and blends well. The leaves are best known as an herb for pregnant women but also said to be beneficial for people at all stages of life.
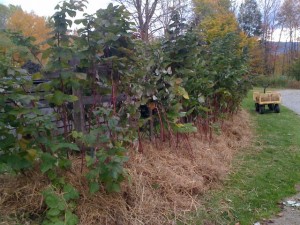 Raspberry Row AFTER pruning and mulching For so-called ever-bearing raspberry varieties, like Heritage, that bear a fall crop of berries on first-year canes, the normal practice is to mow down all the canes at the end of the season to invest fully in the the next year’s fall crop. My fall raspberry season is usually cut short by frost so I haven’t found the mow-down approach to be worthwhile. Instead, I prune my Heritage berries the same way as my summer, Boyne Red berries. The only difference is that after a killing frost, I also prune off the top segments that produced the fall berries. The next summer, this allows side shoots to grow and produce more berries on the same canes.
When finished pruning, I mulch the soil around the plants, applying a thick layer of hay. Hay mulch, as it breaks down, appears to provide sufficient food for the raspberry plants so no other fertilizer or soil amendments are needed. It also suppresses weeds and maintains even soil moisture.
The annual maintenance is complete when all the remaining canes are tucked in between the two levels of wire fencing. Instead of planting raspberries in a patch, I highly recommend planting and training the canes to a row, fencing with a four-wire system and mowing around the row to prevent the plants from spreading horizontally. The four-wire system is explained in this very infomative booklet.
Raspberries are one of the easiest fruits to grow in Zone 4 if you take the time, once a year to give them what they need.
Â
 Roadside apples in early October. Despite the blossom-killing frost last spring, the wild apple crop seems to be as prolific as ever, proving that the feral fruits growing on this hard-scrabble hill are indeed well adapted to harsh conditions. Unlike cultivated varieties that are propagated through grafting (cloning the mother tree) wild apples, like us, are the unique product of two distinct parents. So wild trees, even those growing side-by-side, produce fruits that look and taste completely different.
The apple trees growing along our country road, with their unkempt jumble of limbs and gauges from ditching and plowing aren’t pretty. Their small fruits are pock-marked, insect damaged and bruised, but I love to taste and compare them. When walking up the road with our neighbors through the brilliant fall foliage, we pick apples as we go along, discussing and critiquing them, then later try to remember which trees produce the best fruit. It’s become a fall tradition.
Flavors and textures are as varied as fine wines and can be described in the same way — bright, astringent, coarse, flowery, lingering. Even if the texture isn’t appealing for fresh eating it can be perfectly good for cooking. Timing too can make a difference. One of the most prolific trees on our walks had disappointingly inedible fruit earlier this fall but now after ripening fully, can be eaten and used in cooking. So we’ve learned to sample often and avoid deeming a tree’s fruit to be useless until the end of the apple picking season.
 Apples from the abandoned orchard in the woods, with pumpkins and squash from the garden When combined in cider, sauce or pies, a mix of wild apples results in a product full of character. I am especially fond of apple butter made from wild apples. Apple butter can be as simple as making apple sauce, using any method or recipe, then baking it in wide, shallow pan or cookie sheet in a low oven (about 300 F) for a couple hours until the flavors concentrate and begin to caramelize, stirring occasionally. Most recipes call for cinnamon and other spices, but when using wild apples, I can’t bear to mask the complex apple-ness so tend to cook them up with just a little maple syrup which adds a sweetness that is complementary.
At Kerry and Nate’s annual cider-making party last weekend we pressed wild apples together with the Macs and other orchard grown apples and the resulting cider is a flavor-packed, lip-smacking treat. The perfectly decent, locally produced commercial cider we’d gotten someplace else tastes downright dull in comparison. I’ve got to quick, post this message now so I can justify pouring myself another glass of the wild cider!
|
|


